Frontier Exploration
Northwestern University: Winter Project
Technical Skills Used
- Python
- Rviz & Gazebo
- ROS
- OpenCV
- Navigation Stack
- Pointcloud filtering with PCL
Hardware
How it Works
Check out my Readme to get an understanding of the setup I am working with. Below, I will provide a short summary of how my frontier exploration algorithm works.
The idea behind frontier exploration is to essentially find all the boundaries in a map that are between known and uknown areas and to go to them so that those frontiers can be explored which in turn will produce more frontiers. The process continues until there are no more frontiers.
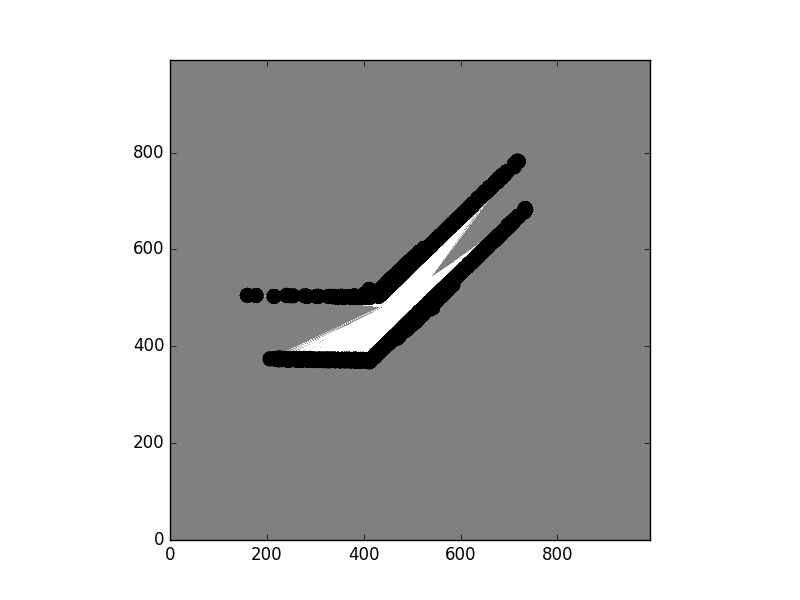
Now back to my summary. After first sending a goal position near the robot to get the relevant topics publishing, the algorithm kicks into affect. First cost data of the cells within the map is retrieved from the /map topic. Then, global costamp data is retreived from the navstack and overlayed onto the map costmap data to take into account the static and inflation layers. With all of this data, we have a map looking much like the left most figure below. (Note, that this map was produced from the simulated world that is shown in the demo video below. Feel free to look there for a reference.) The color mappings are as follows:
- Grey = Uknown Area
- White = Free Space
- Black = Occupied Space
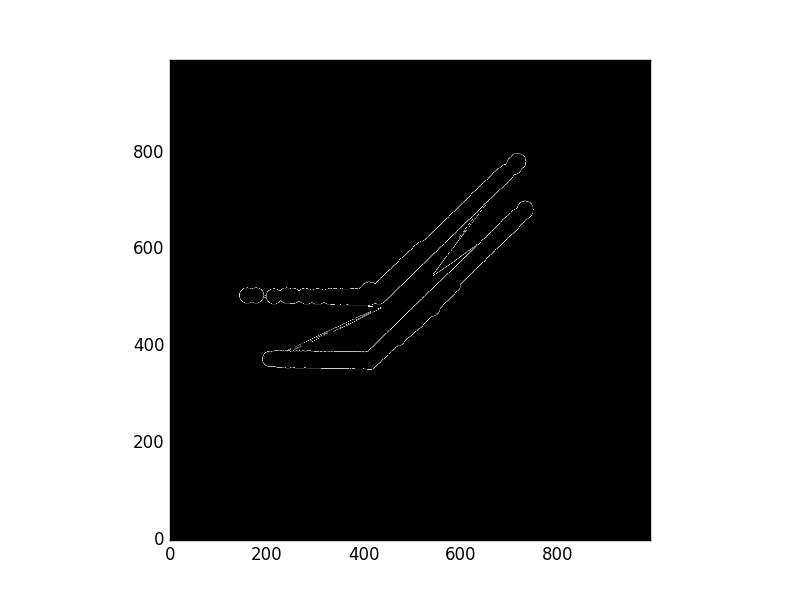
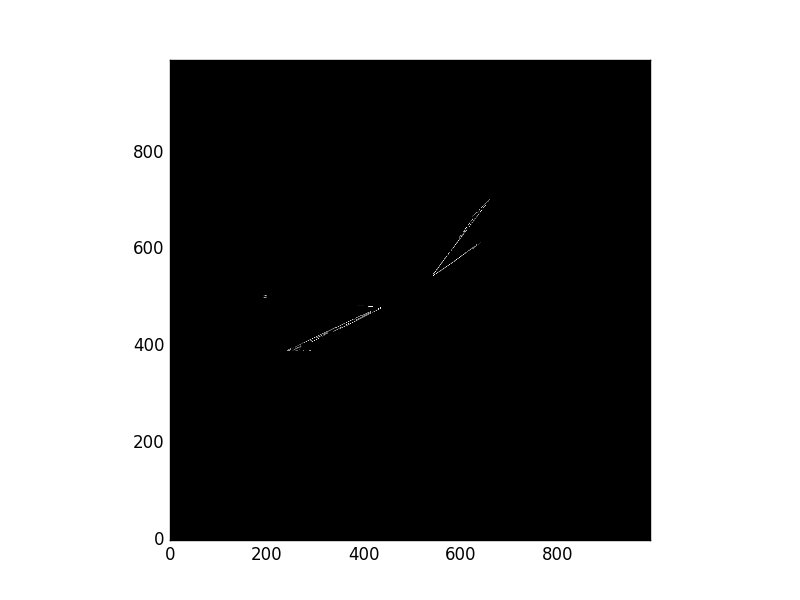
In order to find the frontiers, we must first know where all the edges are within the map. This is found by using the Canny Edge Detection algorithm which is a built in function in the OpenCV library. This produces the second-from-left picture below. This is not enough, however, since we are only interested in the frontier edges, and not the edges between the known and occupied cells. Hence, further processing is done that searches through the list of edge indices in the map and only keeps the ones that have unkown territory next to them. This produces the third picture below. Finally, the centroids of distinct frontiers are determined using OpenCV which are circled in the 4th picture below. At this point, the closest centroid is sent as the next goal for Jackal to go to.

To help make this process more robust, some edge cases have been taken into account in my algorithm that will enable Jackal to free itself from being stuck. You might notice some of these in the videos below. For example, if Jackal notices it's at the same position for too long, it will automatically re-evaluate its position and send out a new goal that it hopefully can go to. Another case is that if Jackal is unsuccessful in getting to a goal area multiple times, it will assume that point is unreachable and will add that point as a taboo position. Last but not least, in the scenario where the sent goal location is where Jackal currently is (due to there being an area right at that point that Jackal was unable to map), the second closest position will be sent in order to prevent an infinite loop.
Finally, a user can define the area that Jackal should explore in RViz as can be seen in the bottom right video below. This can be useful in cases where only certain areas within a building (like main hallways) need to be mapped with the exclusion of less traveled areas (like individual offices and classrooms).
Demo
The left video demos exploration in a simulated world whereas the right video demos exploration in the hallway outside the MSR lab at Northwestern.